About
a year ago I noticed with much aghast the three wooden support beams which sit
on 3 x 3 concrete pillars under the wood shed were suffering from creep (for
the uneducated creep is ~ “The tendency of a solid material to move slowly or
deform permanently under the influence of mechanical stresses”….. At that time thinking
it would prevent further deformation, I locally jacked the shed up and carefully
placed stacked blocks of wood under the worst deformed locations.
A
few weeks after this a significant amount of weight was added when just over three
cord of fire wood was moved into the shed, which is equivalent to volume made
up from 12’ x 8’ x 4’.
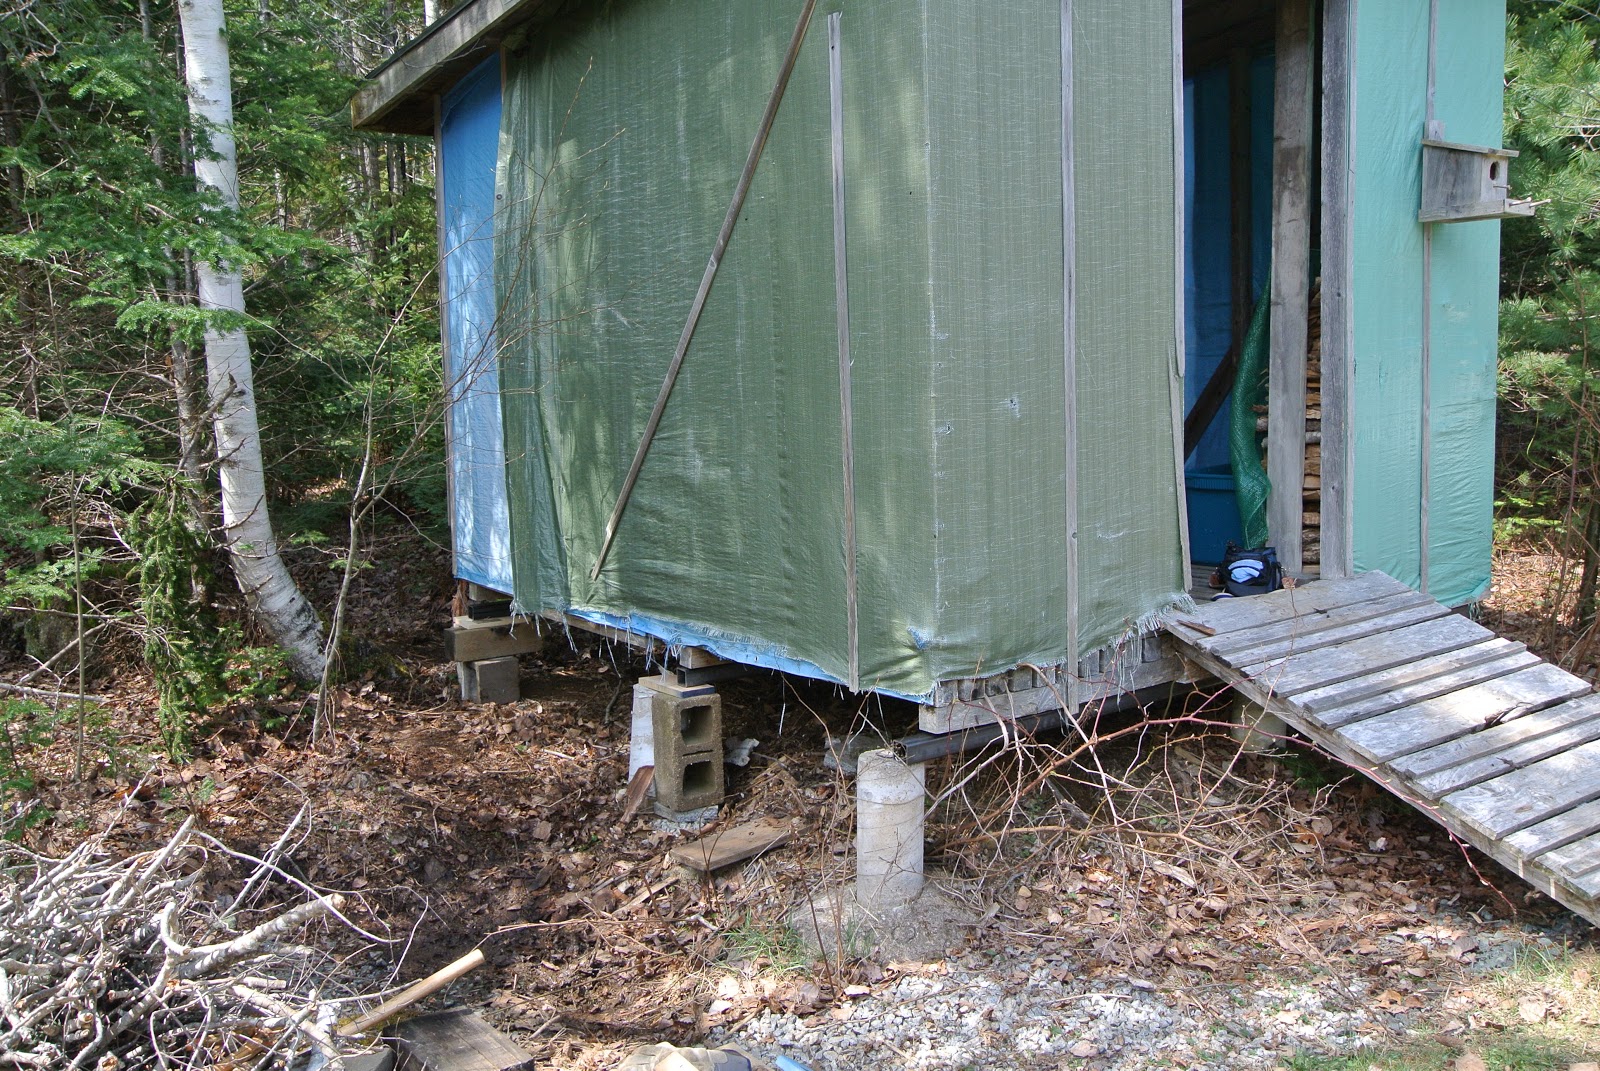
During
this past winter as the fire wood was steadily getting depleted, I noticed in
some areas of the shed floor were no longer level. From under the shed, further
inspection of the three creep affected wooden beams revealed the situation had
dangerously deteriorated. The wooden support blocks which I inserted the year
before, had with the weight of firewood sunk into the soft ground, creating
enough clearance to allow the beams to deform further.
 |
| Uneven shed floor |
 |
| Deformed rear beam |
 |
| Deformed centre beam |
 |
| Deformed centre beam |
 |
| Deformed centre beam, ready to fail |
A
new and more aggressive approach was now urgently required. The options were 1)
To completely dismantle the shed and replace the existing 3” x 3” with 6” x 6” wooden
beams or 2) To jack the shed up and then temporarily support it while sliding
in new stronger 6” x 6” wooden beams to fit under the existing 10’ beams. The resulting
additional height to the shed for each option would be 3” and 6” respectively.
The 6” extra height added by option 2 I considered to be far too much, while
option 1) the dismantling the shed was certainly not favoured, far too big a
job. I then thought why not stay with option 2, but instead of using 6” x 6”
wooden beams try to procure 10’ lengths of steel square tubing.
After
a prolonged search on inter-web (how did we manage before the web …?), I found
a supplier in Dartmouth. I then got a quote for various sizes with delivery and
finally decided upon 2½” x 2½” x 3/16” wall thickness ~ 24 hours after placing
the order, the nearly 200lb bundle arrived in Pleasantville ~ a fantastic service
and all for $248.
Today
was jack the wood shed up day, with great help from Lunenburg County’s other
Scotsman ~ Alan. Suitably attired in fashionable Green Wellies, armed with heavy jacks, wooden & concrete blocks and hopefully a well thought out
plan, the project commenced ….
 |
| The stuff |
 |
| Wullie the Wheel Barrow was also helping |
The
jacking up of the shed and installation of the temporary supports went very
well. It was only after the square the tubes were slid into position that we discovered
with much dismay that the jacking process had moved the shed about 2” forward
and 4” to the right …!!! This had the result on one side of the shed only with
the square tube beams not sitting perfectly on two of the existing concrete pillars.
Regardless of how hard I belted the shed with a sledge hammer I could not in
any way tempt it into moving any closer to its original position.
 |
| Temporary supports in place |
 |
| Temporary supports in place |
 |
| Temporary supports in place |
 |
| Temporary supports in place |
After
much deliberation, some head scratching and surprisingly no hint of panic, it
was unanimously decided to place new supports adjacent to the now almost
redundant existing pillars. Fortunately with the weight of the loaded shed, there
will be no issue with the new supports sinking into the ground, as they are sitting
nicely on the poured concrete which holds the existing pillars in position.
 |
| New adjacent supports at the two rear positions |
 |
| New adjacent supports at the two rear positions |
 |
| Square tube in position with existing concrete pillars |
 |
| Square tube in position with new adjacent pillar |
 |
| Square tube in position with existing concrete pillar |
 |
| Square tube in position with existing concrete pillar |
Due
to the extent of deformation with the existing wooden beams, currently they only
contact the new square tube beams at their low points, I expect over time with the
weight of the fire wood this situation will correct itself.
All
issues (I hope) are now solved ……. by those two ~
 |
| ....... with nice but dirty Green Wellies |


Ferr th' jab, lads!
ReplyDeleteIt is now filled with wood ....!!!!!
ReplyDelete